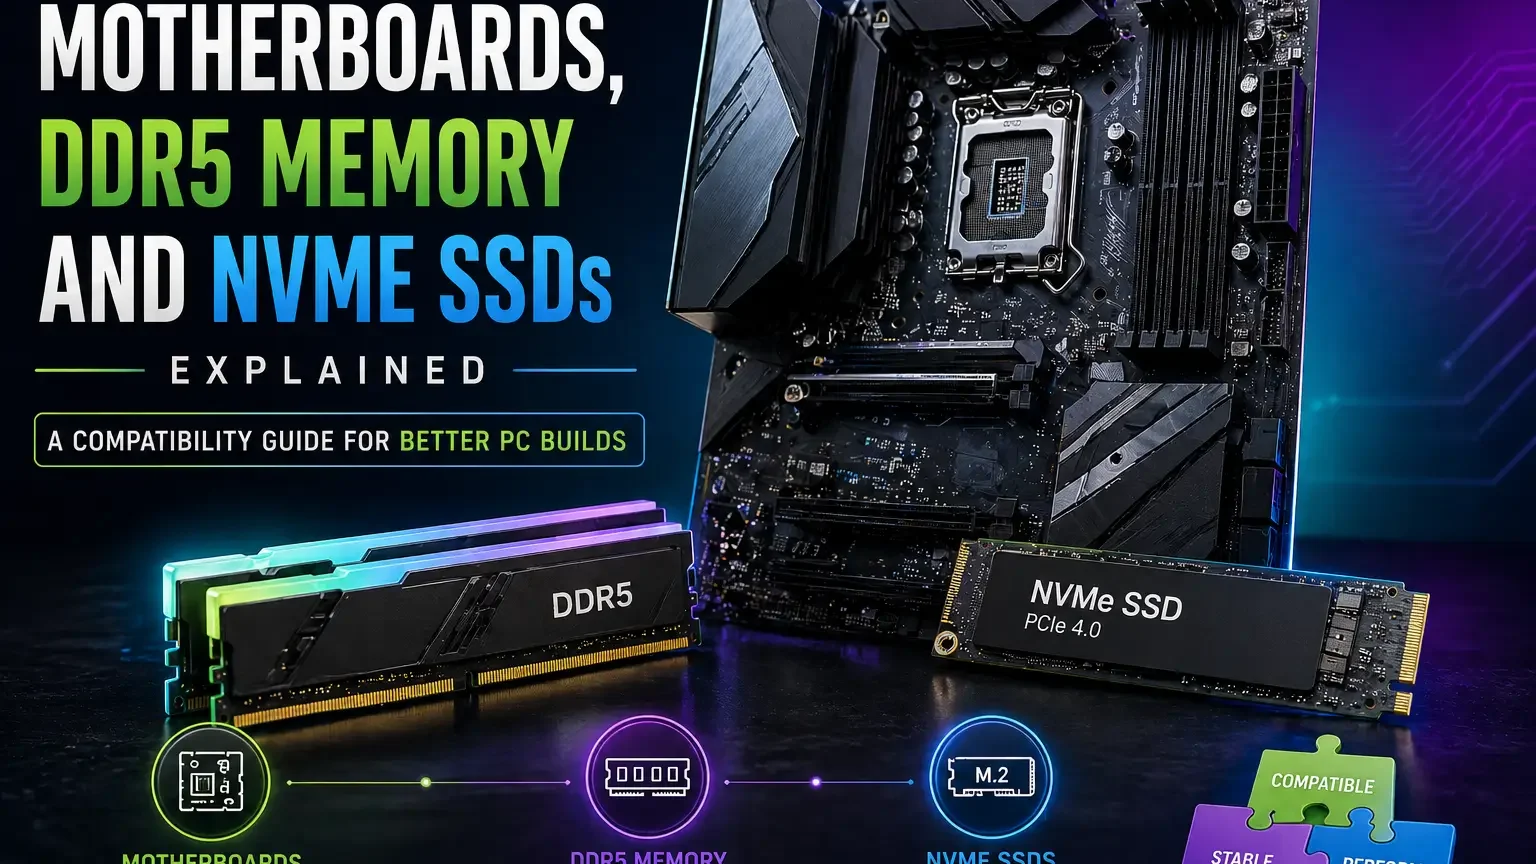
Compatibility is where many PC builds succeed or fail. A fast CPU, premium DDR5 memory kit, and high-end NVMe SSD can still create frustration if the motherboard does not support the processor out of the box, the memory profile is unstable, the M.2 slot shares lanes with another device, or the case lacks the clearance required for the board and cooler. The parts may all be good. The platform may still be wrong.
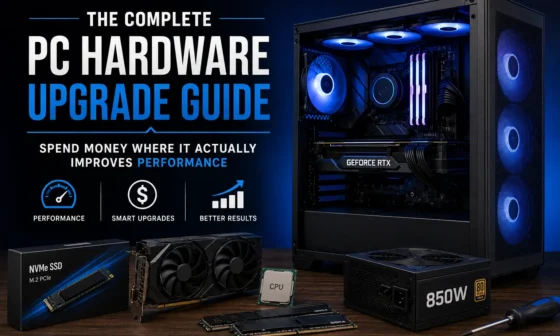
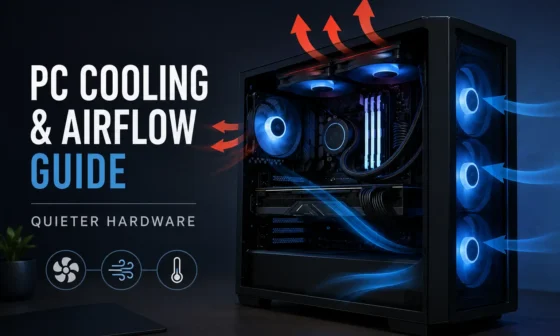
This guide explains how motherboards, DDR5 memory, NVMe SSDs, PCIe lanes, BIOS support, form factors, headers, storage planning, and platform upgrades fit together. It is designed to help you buy parts that work as a system rather than a pile of impressive boxes. For broader spending priorities, see the PC hardware upgrade guide. For the physical stability side of the build, pair this with the PC airflow, cooling and power stability guide.
The key idea is simple: compatibility is not a single yes-or-no checkbox. It is a chain of details. The more carefully you check the chain before buying, the less time you spend troubleshooting after assembly.
Compatibility Checklist at a Glance
Before buying a motherboard, memory kit, or NVMe drive, use this table to slow the decision down. It highlights the questions that prevent the most common platform mistakes.
| Compatibility Item | Question to Ask | Why It Matters |
|---|---|---|
| CPU socket | Does the exact CPU fit this board? | Physical socket match is the first requirement. |
| BIOS support | Does this BIOS version support the CPU? | A board may need firmware before it can boot. |
| Memory type | Is the board DDR4 or DDR5? | Memory standards are not interchangeable on ordinary boards. |
| M.2 slots | Which slots share lanes or disable ports? | Storage layout can change other expansion options. |
| Form factor | Will the board fit the case? | Size affects slots, clearance, and cable routing. |
| Headers | Does the board support case USB, fans, pump, and lighting? | Missing headers reduce convenience or require adapters. |
| Power delivery | Is the board appropriate for the CPU workload? | Sustained load can stress weak board designs. |
See the Motherboard as the Platform, Not the Decoration
A motherboard is the platform that connects the CPU, memory, storage, graphics card, cooling, power delivery, USB, networking, firmware, and expansion options. Compatibility is the quiet part of a PC build, but it is what decides whether the expensive parts actually work together. It is tempting to choose a board by appearance or the number of labels on the box, but the real value is whether it supports the build cleanly for several years. A motherboard, memory kit, processor, storage drive, and case can all be good products on their own and still be a poor match in the same machine.
The safest habit is to translate every feature into a requirement. Check the socket, chipset, BIOS support, memory type, form factor, VRM design, M.2 slots, PCIe layout, rear I/O, internal headers, and case compatibility. That means checking the socket, chipset, memory support, slot layout, storage lanes, firmware needs, cooler clearance, front-panel connectors, and long-term expansion before treating a part as a bargain.
The purchase decision should be based on the platform you want to live with, not only the first CPU or SSD you plan to install. Choose the least expensive board that provides the stability and features you will genuinely use, then spend the remaining budget on parts that affect the workload more directly. A well-chosen board and memory setup can make future upgrades uneventful, while a rushed platform decision often creates annoying limits later.
The pitfalls are usually hidden in small details. A board that is cheap in the cart can become expensive if it lacks the storage, headers, firmware support, or power delivery needed for the build. Read compatibility notes slowly, assume nothing about lane sharing or physical clearance, and keep the build simple unless a feature has a clear purpose. A good board disappears into the background because everything simply works.
- Start with CPU socket and memory type.
- Count real ports and slots, not marketing terms.
- Check case form factor before buying.
Match the CPU Socket Before Anything Else
The CPU socket is the first compatibility gate because a processor physically and electrically fits only the socket family designed for it. Chipset names, board prices, and memory support do not matter if the CPU cannot be installed or is not supported by firmware.
Confirm the exact processor model, motherboard socket, chipset support, and BIOS version required for that CPU.
If a board supports the socket but needs a firmware update for the processor, make sure you can perform that update before assembly.
Some buyers see a familiar brand and assume every recent CPU from that brand fits every recent motherboard, which is not how platforms work. Socket support is the door; BIOS support is the key.
- Verify exact CPU model support.
- Check whether BIOS flashback is available if needed.
- Do not rely on brand compatibility alone.
Understand Chipsets Without Overbuying
A chipset affects expansion, I/O options, overclocking support, storage behavior, and platform features, but it does not automatically make every PC faster. The best chipset for a build depends on whether you need extra ports, multiple drives, stronger tuning features, or simply a stable everyday system.
Compare USB needs, M.2 slot count, PCIe lane behavior, networking, memory support, CPU tuning options, and the number of devices you expect to connect.
Buy into a chipset tier for features and flexibility, not because a higher tier feels more premium.
Overspending on a chipset can steal budget from the graphics card or SSD, while underspending can block future storage or expansion plans. The right chipset is the one whose features match the machine’s job.
- List the devices you plan to install.
- Avoid paying for features you will never use.
- Leave some room for future storage if the PC will grow.
Pay Attention to VRM Quality and Cooling
Voltage-regulation hardware helps feed the CPU clean power, and its quality matters more as processor power draw, sustained workloads, and cooling restrictions increase. A basic office processor does not need an extreme board, but a high-power CPU in a long rendering workload should not be paired with a board that struggles to stay cool.
Look for appropriate VRM heatsinks, credible board reviews when available, case airflow around the socket area, and whether the board is commonly paired with the CPU class you plan to use.
Match board power delivery to the processor and workload duration rather than buying the cheapest board that technically boots.
Weak VRM cooling can cause lower sustained performance or stability issues that appear only after the system has been under load for a while. Power delivery is boring until it becomes the reason the system cannot stay consistent.
- Consider CPU power and workload length.
- Keep airflow around motherboard heatsinks.
- Avoid extreme CPUs on bargain boards.
Choose DDR5 Capacity Before Chasing Extreme Speed
DDR5 memory brings modern bandwidth and platform features, but the most useful memory decision is still whether you have enough capacity for your workload. A system that runs out of memory feels rough no matter how fast the memory kit looks on the label.
Check current memory use during heavy sessions, application recommendations, number of slots, supported memory speed ranges, and the motherboard’s qualified memory notes.
Choose capacity first, then a sensible speed and latency profile that the platform can run reliably.
Extreme profiles may require tuning, may not run with all slot configurations, and may offer less benefit than simply having enough memory. Memory that is stable and sufficient is better than memory that is impressive but fragile.
- Buy enough capacity for the workload.
- Prefer matched kits over mixed modules.
- Stability beats theoretical memory speed.
Understand Channels, Slots and Module Layout
Memory performance depends not only on capacity and speed but also on how modules are installed across channels. Most mainstream desktop platforms are designed for dual-channel operation, which usually means installing two matched modules in the recommended slots.
Read the motherboard manual for slot order, confirm whether you have two or four modules, and check whether higher capacity kits place more stress on the memory controller.
For many users, two matched modules provide the cleanest balance of capacity, stability, and future flexibility.
Filling every slot can look complete but may reduce achievable memory speed or require more tuning. Use the slot layout the platform expects instead of guessing by symmetry.
- Follow the manual’s recommended slots.
- Use matched modules when possible.
- Do not assume four sticks are always faster.
Read Memory Profiles as Convenience, Not Guarantees
Memory profiles are settings that help a kit run at advertised values, but stable operation still depends on the CPU memory controller, motherboard, BIOS, and module layout. A profile that works instantly on one system may require adjustment on another, especially with high-capacity or high-speed kits.
Update firmware when appropriate, enable the intended profile, test stability, and be prepared to choose a slightly more conservative setting if needed.
Use the fastest stable setting that matters for your workload, not the most aggressive number the kit can display.
Assuming a profile is guaranteed can lead to crashes, file corruption risk, or confusing intermittent errors. Memory tuning should be stable first and fast second.
- Enable profiles deliberately, not blindly.
- Test memory stability after changes.
- Lower settings if the system becomes unreliable.
Choose NVMe Storage by Use Case
NVMe SSDs are excellent for operating systems, applications, games, active projects, scratch files, and fast transfers, but the best drive depends on capacity, endurance, controller behavior, heat, and price. Most everyday users benefit more from enough SSD space than from paying heavily for peak sequential numbers they rarely use.
Check M.2 slot type, supported PCIe generation, drive length, heatsink clearance, endurance rating, warranty, and whether the drive will hold an operating system, games, or heavy project files.
Use a reliable, appropriately sized NVMe drive for active work and consider separate storage for archives and backups.
Buying a tiny premium drive can feel fast at first but become frustrating once it fills with games, cache, and system updates. Storage comfort comes from speed, capacity, reliability, and free space together.
- Choose capacity for real data growth.
- Use heatsinks where drives run warm.
- Keep backups separate from the working drive.
Understand PCIe Generations Without Panic
PCIe generations describe link capability, but real-world benefit depends on the device, workload, slot wiring, and whether the platform can use the extra bandwidth. A graphics card, SSD, capture card, and network card do not all need the same amount of bandwidth in ordinary use.
Check which slot is connected to the CPU, which slots are routed through the chipset, what generation each slot supports, and whether installing one device changes another slot’s behavior.
Use higher-generation slots for devices that can benefit, but do not assume every component becomes slow just because it runs on an older compatible link.
People sometimes overspend on a platform for bandwidth they cannot use while ignoring memory capacity, cooling, or GPU class. PCIe compatibility is about fit, lanes, and workload, not fear.
- Read the motherboard lane-sharing notes.
- Install the main GPU in the primary slot.
- Use fast M.2 slots for active storage when available.
Watch for M.2 Slot Sharing and Hidden Trade-Offs
Motherboards often share bandwidth between M.2 slots, SATA ports, and PCIe slots, especially on compact or budget boards. A board may advertise several storage connectors, but using all of them at once can disable a port or change slot speed.
Read the storage section of the motherboard manual and look for notes about disabled SATA ports, reduced PCIe lanes, or slot priority.
Plan storage layout before buying multiple drives so the operating-system drive, game drive, project drive, and archive drive each have a sensible place.
Discovering lane sharing after assembly can force a messy storage rearrangement or leave a drive performing below expectations. The manual’s footnotes often matter more than the product-page headline.
- Check lane sharing before installing drives.
- Keep the boot drive in a preferred slot.
- Plan future storage growth.
Choose the Right Form Factor for the Case and Expansion Plan
ATX, microATX, and mini-ITX boards differ in size, slot count, connector placement, building difficulty, and future expansion room. Smaller boards can be excellent, but compact builds require stricter planning around cooling, cable space, storage, and graphics-card clearance.
Confirm case support, GPU slot clearance, cooler height, radiator mounts, cable-routing space, fan headers, and whether you need additional PCIe cards later.
Use ATX when expansion and easy building matter, microATX for value and moderate size, and mini-ITX when compactness is worth the extra planning.
Buying a small board to save money can be frustrating if it lacks headers or slots the case and hardware need. Form factor is a build experience decision as much as a size decision.
- Match board size to the case.
- Think about future cards and drives.
- Do not underestimate cable space in small builds.
Check Rear I/O and Internal Headers
Ports and headers decide how convenient the computer feels after it is built. USB speed, USB-C, audio, networking, Wi-Fi, fan headers, RGB headers, front-panel USB, and pump headers may matter more in daily use than a decorative heatsink.
List your keyboard, mouse, audio gear, external drives, camera, capture devices, network needs, case front-panel connectors, and cooling hardware.
Choose a board that supports the devices you already use and the case connectors you paid for.
A case with front USB-C is less useful if the motherboard lacks the internal header, and a cooling plan is messier if fan headers are too few or poorly placed. Convenience features are only convenient when they match your actual desk.
- Count rear USB ports before buying.
- Check front-panel USB-C header support.
- Make sure fan and pump headers fit the cooling plan.
Treat BIOS and Firmware as Part of Compatibility
Firmware controls CPU support, memory behavior, storage booting, fan control, security features, and bug fixes. A system may be physically compatible but still require a BIOS update to boot a newer processor or run memory reliably.
Check the manufacturer support page, CPU support list, BIOS update notes, and whether the board can update firmware without an older CPU.
Update firmware when it solves a compatibility or stability need, and avoid unnecessary updates in the middle of a stable work period unless there is a reason.
Ignoring firmware can cause no-boot surprises, while careless updating without power stability or instructions can create avoidable risk. Firmware should be respected, prepared, and documented.
- Download firmware from the official support page.
- Use BIOS flashback when needed and supported.
- Record the version after the build is stable.
Plan Storage for Backups, Not Only Speed
A fast NVMe drive is not a backup, and neither is a second partition on the same physical drive. Hardware buyers often focus on speed while forgetting that drive failure, accidental deletion, ransomware, or a bad update can destroy important data.
Identify active data, archive data, irreplaceable files, system images, cloud copies, and external or network backup options.
Use fast internal storage for work and applications, then keep a separate backup strategy that survives the loss of the main PC.
A large single SSD can create confidence until everything important lives on one device with no independent copy. The best storage plan includes recovery, not only capacity.
- Keep backups physically or logically separate.
- Test recovery before you need it.
- Do not confuse extra internal storage with backup.
Avoid Compatibility Mistakes During Platform Upgrades
A platform upgrade usually changes several things at once: CPU, motherboard, memory, cooler mounting, firmware, operating-system behavior, and sometimes power or storage layout. Because many variables change together, preparation matters more than speed.
Back up data, confirm cooler bracket support, check memory kit compatibility, download network drivers, note BitLocker or encryption status, and prepare installation media if needed.
Build in stages, confirm POST, check firmware, test memory, then move into operating-system and driver work.
Rushing platform assembly can turn a missing cooler bracket or disabled storage port into a confusing failure. A platform upgrade is a controlled migration, not a casual part swap.
- Back up before changing platform parts.
- Prepare drivers and installation tools.
- Keep old parts until the new platform is stable.
Choose Motherboards for Different Build Types
A motherboard for a compact living-room PC, a gaming tower, a workstation, and a storage-heavy editing system should not be chosen with the same checklist. The right board is the one whose strengths match the build’s identity.
For gaming, check GPU slot layout, audio, networking, and M.2 support; for creation, check memory capacity, storage, USB, and power delivery; for compact builds, check headers, clearance, and thermals.
Rank the features that matter to your build type before comparing prices.
A board can be excellent in a review and still be wrong for your case, storage plan, or workload. There is no best motherboard, only the best fit for the build.
- Gaming: GPU clearance, networking, storage.
- Creation: memory capacity, USB, active storage.
- Compact: clearance, headers, thermal layout.
Troubleshoot No-Boot Problems Methodically
No-boot problems feel dramatic, but many come from simple issues such as memory seating, CPU power cables, monitor connection, BIOS support, or front-panel wiring. A calm checklist is better than removing random parts in frustration.
Confirm power cables, use the correct display output, reseat memory, check diagnostic LEDs, clear CMOS if appropriate, and test with the minimum required hardware.
Reduce the system to a known-good basic configuration, solve POST first, then add devices back one at a time.
Changing too many things at once can hide the original mistake and create new ones. Troubleshooting works best when the system gets simpler before it gets more complete.
- Check CPU power as well as motherboard power.
- Use recommended memory slots.
- Add drives and accessories after POST is stable.
Read Spec Sheets With a Builder’s Eye
Spec sheets are useful only when you translate them into physical, electrical, and practical meaning. Terms like lanes, headers, phases, slots, generations, and profiles should answer real questions about what you can install and how it will behave.
Compare the spec sheet with the manual, look at board diagrams, confirm slot spacing, and read footnotes about shared bandwidth.
Treat marketing pages as an overview and manuals as the build document.
Product pages often highlight the maximum possible feature count while the manual explains the conditions and limitations. The manual is where compatibility becomes real.
- Download the manual before purchase.
- Look for footnotes and diagrams.
- Confirm physical spacing, not only feature names.
Make the Platform Evergreen With a Clear Upgrade Path
An evergreen hardware platform is not the most expensive one; it is the one that leaves sensible room for the upgrades you are likely to make. That may mean spare memory capacity, a second M.2 slot, enough fan headers, a quality power supply, useful rear I/O, or a case that fits a future graphics card.
Think about the next two realistic upgrades and whether today’s motherboard, memory, storage, case, and PSU will support them.
Pay for flexibility you can describe, not vague future-proofing that has no practical plan.
Future-proofing becomes wasteful when it means buying every premium feature without knowing why. A platform lasts longer when it is chosen with realistic growth in mind.
- Plan two likely future upgrades.
- Keep expansion simple and documented.
- Avoid paying for imaginary needs.
Check Cooler Mounting Hardware During Socket Changes
A CPU cooler can be excellent and still require different mounting hardware when the platform changes. This detail is easy to forget because the cooler may physically look compatible until assembly reaches the bracket stage.
Confirm socket mounting support, bracket availability, backplate requirements, cooler orientation, memory clearance, and whether the manufacturer sells an upgrade kit.
If you are reusing a cooler, verify mounting hardware before ordering the motherboard and CPU so the build does not stop halfway.
Assuming an old cooler will automatically move to a new socket can lead to delays or a temporary downgrade. Cooler compatibility belongs in the platform checklist, not as an afterthought.
- Check socket brackets before disassembly.
- Confirm memory clearance with tower coolers.
- Order mounting kits early if required.
Plan Networking and Audio Instead of Assuming They Are Good Enough
Networking and audio are often ignored until the PC is already built, yet they shape daily use for gaming, streaming, calls, downloads, and content work. Some users need fast wired networking, stable Wi-Fi, Bluetooth for peripherals, optical audio, or cleaner microphone behavior.
Check Ethernet speed, Wi-Fi generation, antenna placement, Bluetooth needs, audio outputs, microphone input quality, and whether expansion cards will fit later.
If networking or audio is important, choose a motherboard that includes what you need or leaves space for a quality add-in card.
Relying on adapters after the fact can clutter the desk, consume USB ports, and create avoidable troubleshooting. Convenience features are part of platform value when you use them every day.
- Check wired and wireless networking needs.
- Make sure antennas have a clear location.
- Leave a slot free if you may add a card later.
Respect Operating-System and Driver Migration
Changing the motherboard can affect activation, storage boot mode, security settings, chipset drivers, and device behavior inside the operating system. A platform upgrade is smoother when software preparation happens before the old hardware is removed.
Back up data, save important license information, check encryption keys, download network and chipset drivers, and decide whether a clean installation is better than migration.
For a minor storage or memory change, migration may be simple; for a full platform change, a clean installation can remove old driver clutter and hidden conflicts.
A perfect hardware build can still feel broken if the operating system is carrying old drivers or cannot access the network after first boot. Software readiness is part of hardware compatibility.
- Back up and record activation details.
- Prepare network drivers offline.
- Consider a clean install for major platform changes.
Document Slot Layout for Future Maintenance
Once the system is built, it is easy to forget which M.2 slot holds the boot drive, which SATA port was disabled, which memory slots are populated, and which headers control which fans. Good documentation is especially helpful months later when adding storage, troubleshooting a fan, or selling the system.
Take photos before panels close, save the motherboard manual, label unusual cables, and write a short note about storage and fan placement.
Keep documentation with receipts and BIOS notes so future upgrades begin with facts rather than guesswork.
Without notes, a simple SSD addition can turn into a full rediscovery of the platform. A documented build is easier to upgrade and easier to trust.
- Photograph the board before closing the case.
- Note which slots and headers are used.
- Store the manual and BIOS version with build records.
Frequently Asked Questions
How do I know if a motherboard supports my CPU?
Check the motherboard manufacturer’s CPU support list for the exact processor model and the required BIOS version. Matching the socket is necessary, but firmware support is also important.
Is DDR5 always better than DDR4?
DDR5 is the modern direction on many newer platforms, but the best choice depends on the platform you are building. You cannot freely swap DDR4 and DDR5 on the same board unless the board is specifically designed for one type, and most boards support only one memory type.
Does a faster NVMe SSD make games faster?
A good SSD can improve loading and file movement, but peak sequential speed does not automatically increase frame rate. Capacity, reliability, heat behavior, and platform support are often more important for everyday gaming storage.
How many M.2 slots do I need?
One M.2 slot can be enough for a simple PC, but two or more provide flexibility for a separate game, project, or scratch drive. Check lane sharing so that adding a drive does not disable something else you need.
Is mini-ITX bad for performance?
Mini-ITX is not bad, but it requires more planning. Cooling, cable space, slot count, storage, and power-supply choices are tighter, so part selection matters more than in a larger case.
Should I update BIOS before installing Windows?
Update BIOS before or during the build only when needed for CPU support, memory stability, or important fixes. Follow official instructions carefully, keep power stable, and avoid unnecessary updates when the system is already stable.
Advanced Platform Planning: Build Around the Board’s Real Limits
A motherboard should be judged by the way it organizes the whole computer, not by how dramatic it looks through a side panel. The board decides which CPU families are possible, how memory is installed, how many storage drives can run cleanly, where the graphics card sits, which USB ports are available, and how future upgrades will feel. A beautiful board with awkward slot sharing or missing internal headers can be less useful than a plain board that matches the build exactly.
Start by writing the platform requirements in plain language. For example: one modern graphics card, two NVMe drives, 32 GB or 64 GB of DDR5, front USB-C, Wi-Fi, a quiet tower cooler, and room for one capture card. That list immediately narrows the board search because it exposes the connectors, slots, lanes, and physical clearances that matter. It also prevents overbuying features that look impressive but will remain unused.
Think of the motherboard manual as a map, not as paperwork. It shows which M.2 slots share bandwidth, which SATA ports may be disabled, which memory slots should be filled first, where fan headers are located, how front-panel wiring is arranged, and what BIOS recovery options exist. Reading the manual before purchase can feel boring, but it is much easier than discovering a lane-sharing rule after the drive and graphics card are already installed.
CPU Socket, Chipset and BIOS Support
The socket is the physical starting point, but support does not end there. A CPU can match the socket and still need a BIOS update before the system boots. This matters most when a motherboard was manufactured before a newer processor was released. Boards with BIOS flashback or similar recovery features are easier to handle because they can sometimes be updated without a working older CPU. Without that feature, the buyer may need retailer assistance or a temporarily compatible processor.
The chipset determines the surrounding feature set: expansion options, connectivity, overclocking support, storage flexibility, and sometimes the number of high-speed ports. A higher chipset is not automatically better for every user. Someone building a simple gaming PC with one graphics card and one or two drives may not need the most expensive board tier. Someone using multiple drives, add-in cards, high-speed networking, or professional peripherals may benefit from the extra lanes and ports.
BIOS maturity can influence memory stability, boot behavior, sleep reliability, and device compatibility. Early platform launches sometimes improve through firmware updates over time. That does not mean you should update every week, but it does mean firmware should be treated as part of the platform’s health. Save the current settings before updating, read the release notes, and avoid interrupting the process. A careful BIOS update can solve problems, while a careless one can create them.
DDR5 Memory: Capacity, Speed and Stability
Capacity should be chosen before speed because running out of memory is more disruptive than missing a small bandwidth improvement. A general modern desktop may be comfortable with 32 GB, while heavy content creation, large development projects, virtual machines, and professional datasets can justify 64 GB or more. The right amount depends on the applications open at the same time, not only on the most demanding single program.
DDR5 speed ratings are useful, but they are not promises for every combination of CPU, board, and module layout. Memory stability depends on the processor’s memory controller, BIOS tuning, number of modules, rank organization, and profile settings. Two modules are often easier to run at higher speeds than four modules. Large-capacity kits can require more conservative settings. A stable system that performs consistently is better than an impressive setting that produces rare crashes.
Use matched kits when possible. Combining separate memory kits can work, but it increases uncertainty because even similar-looking modules may use different chips, subtimings, or revisions. If you know you will need 64 GB, buying a 64 GB kit is cleaner than buying 32 GB now and hoping another 32 GB will behave identically later. Expansion is convenient, but planning the intended capacity from the beginning is usually safer for DDR5 builds.
Memory profiles such as XMP or EXPO are convenience settings. They save time by loading speed, voltage, and timing values, but they still depend on platform support. After enabling a profile, run real stability checks and pay attention to sleep behavior, game crashes, archive extraction, large file transfers, and memory-heavy work. Errors that appear once a week are still errors, and they can damage confidence in the whole machine.
NVMe Storage: Speed, Slots and Practical Layout
NVMe drives are fast enough that the best choice is often about capacity, endurance, thermals, warranty, and workload rather than headline sequential speed. A boot drive should have enough room for the operating system, applications, caches, updates, and temporary files. A separate project or game drive can keep large libraries from crowding the system disk. A backup drive should not be confused with extra internal storage because a drive inside the same PC is still exposed to many of the same risks.
PCIe generation labels can be misleading for everyday users. A newer generation can deliver impressive benchmark numbers, but many common tasks do not use that speed for long. Game loading, app launching, and file browsing may feel similar once the system already has a decent NVMe drive. Heavy video work, large data transfers, scratch-disk activity, and professional workloads can benefit more clearly. Buy the drive for the job instead of assuming the highest number always changes daily life.
M.2 slot location matters. A slot under the graphics card may run warmer because it sits near a major heat source. A slot connected through the chipset may share bandwidth with other devices. A slot with a heatsink may require careful installation so the thermal pad contacts the drive properly. Small details decide whether a fast drive remains fast during sustained work.
Plan storage names and roles from the beginning. For example, keep the operating system on one drive, active projects on another, archives on larger economical storage, and backups on an external or network destination. A clear layout makes reinstalling Windows, replacing a drive, and finding large files less stressful. Performance is useful, but organization is what keeps the machine pleasant over several years.
Expansion, Lanes and Slot Sharing
PCIe lanes are the hidden traffic routes of a modern PC. The CPU and chipset provide a limited number of high-speed connections, and the motherboard manufacturer decides how those routes are assigned. This is why adding an NVMe drive can sometimes disable a SATA port, reduce a secondary slot, or change how bandwidth is distributed. These rules are not defects; they are design trade-offs that must be checked before the build is finalized.
Most gaming systems only need one full-speed graphics slot and a small number of storage devices. More complex systems may need a capture card, 10 GbE network adapter, sound interface, additional USB controller, or storage expansion card. In those builds, physical slot spacing becomes as important as electrical bandwidth. A large graphics card can cover nearby slots, and a compact board may not leave enough room for the add-in cards that the user planned to install later.
External connectivity can reduce internal complexity. A user who needs fast external drives may care more about USB-C speed, USB4 support, or Thunderbolt-style functionality than about another internal M.2 slot. Someone with many peripherals may care about rear I/O count and internal USB headers. A motherboard should match the whole desk setup, not only the parts inside the case.
Form Factor and Case Fit
ATX, micro-ATX, and mini-ITX boards can all be excellent when used in the right context. ATX offers more space for slots and headers. Micro-ATX can be a strong value when the user does not need every expansion option. Mini-ITX enables compact builds but demands careful planning because there are fewer slots, fewer headers, and less room around the socket. The form factor should be chosen with the case, cooler, GPU, and cable plan in mind.
Cooler clearance should be checked around the socket area, not only against the case height limit. Large air coolers can overhang memory slots or sit close to motherboard heatsinks. AIO radiators introduce their own clearance questions around the top, front, tubes, and memory area. The motherboard, case, cooler, and memory kit form a physical puzzle. Solving that puzzle before purchase prevents awkward compromises during assembly.
Front-panel connectors are another practical detail. A case with front USB-C needs the matching internal header on the motherboard. Multiple case fans may require enough fan headers or a quality hub. RGB lighting, if used, needs compatible control headers. Builders often focus on CPU and memory compatibility while forgetting the small connectors that affect the daily experience of the case.
Troubleshooting a New Platform Calmly
No-boot troubleshooting should begin with the simplest controlled configuration. Install the CPU, cooler, one memory module in the recommended slot, the graphics output required by the processor, and the boot drive only when appropriate. Check power connectors, monitor input, memory seating, and front-panel wiring. Many failed first boots come from small assembly details rather than defective parts.
Debug LEDs, beep codes, and postcode displays are helpful because they show where the board is stopping. A memory light does not always mean the memory is bad; it can also indicate training behavior, incorrect slot use, unstable settings, or a CPU seating issue. A storage error may be caused by boot order, installation media, slot sharing, or a disabled controller. Read the signal as a starting point, not as a final verdict.
Change one setting at a time after the system boots. Enable memory profiles, test stability, then adjust fan curves, storage settings, virtualization, resize-bar options, or other features. If everything is changed at once, the cause of a crash becomes harder to find. A calm setup process may feel slower on day one, but it saves hours of confusion later.
Long-Term Platform Ownership
A good platform remains understandable after the excitement of the build fades. Keep a record of the motherboard model, BIOS version, memory kit part number, storage locations, enabled profiles, fan-header assignments, and special lane-sharing rules. Tape a small diagram inside the case panel if the layout is complicated. Future you will appreciate knowing which M.2 slot holds the boot drive and which SATA ports are disabled by design.
Plan for replacement, not only expansion. Drives eventually fill, fans wear, batteries drain, and new operating-system requirements appear. A board with accessible slots, clear documentation, and sensible cable paths makes maintenance less intimidating. The best PC is not the one that never changes; it is the one that can be serviced without turning every small repair into a rebuild.
Finally, resist the urge to buy a motherboard purely as a status symbol. Spend where the board improves your actual build: stable power delivery for the chosen CPU, enough memory support for the intended capacity, the right storage layout, useful rear I/O, clean front-panel support, and a form factor that fits the case. The platform should make the rest of the computer easier to own. When it does that, the motherboard has done its job.
Example Platform Choices
A mainstream gaming build usually needs fewer motherboard features than buyers assume. One graphics card, two memory modules, one or two NVMe drives, several USB devices, and a stable network connection cover most needs. In that situation the buyer should prioritize a reliable board with the right socket, sensible VRM cooling, enough fan headers, front USB-C support if the case uses it, and a layout that leaves the graphics card enough space. Paying extra for unused expansion slots or extreme overclocking features may not improve the gaming experience.
A creator build may need a different platform balance. Large memory capacity, multiple fast drives, high-speed external storage, strong networking, extra USB ports, and reliable sustained power delivery can matter more than decorative lighting or luxury packaging. The best board for this user is the one that supports the complete workflow: camera media, scratch files, archive drives, audio devices, capture gear, and backups. A creator platform should be judged by the time and friction it removes.
A compact living-room PC or travel-friendly workstation should start with the case and cooler limits. Mini-ITX boards can be excellent, but the reduced space makes every connector choice more important. Two M.2 slots, Wi-Fi, enough rear USB, a well-placed CPU socket, and accessible fan headers may matter more than broad expansion. Because future changes are harder in a compact build, the initial planning should be more deliberate.
Compatibility Myths to Avoid
One myth says that any board with the right socket is a safe match. Socket compatibility is necessary, but it is not the whole story. BIOS version, chipset support, VRM capability, cooler mounting, memory behavior, and case layout can all decide whether the platform is practical. A board can technically accept a processor and still be a poor partner for it if power delivery or firmware support is weak.
Another myth says that the fastest listed memory kit is always the best choice. Very high DDR5 speeds can be useful in certain conditions, but stability and capacity matter more for many users. A slightly slower kit that runs cleanly every day may be a better purchase than an aggressive kit that requires hours of tuning. Memory should support the workload, not become the workload.
A third myth says that the newest NVMe generation is required for every modern build. Fast storage is valuable, but capacity, reliability, thermals, and price per gigabyte often matter more than peak sequential numbers. A balanced system may use a premium drive for active projects and a larger value drive for game libraries or archives. The smartest storage layout is the one that fits the work pattern.
Pre-Build Inspection Routine
Before assembly, place the motherboard on its box and identify every connector you will use. Find the CPU power connectors, main power connector, fan headers, front-panel header, USB headers, audio header, M.2 slots, PCIe slots, and debug indicators. This simple tour makes the build less stressful because the board no longer feels like an unfamiliar maze when it is inside the case.
Check the case accessories before installing the board. Standoffs, screws, front-panel cables, fan hubs, drive brackets, and radiator mounts should be understood early. An extra standoff in the wrong place can cause electrical problems, while a missing standoff can leave the board unsupported. Careful preparation protects the components and makes troubleshooting easier if the system does not start immediately.
Install storage and memory in the recommended locations. Motherboard manuals usually specify which memory slots to fill first and which M.2 slot connects most directly to the CPU. Following those recommendations avoids preventable boot issues and performance surprises. Builders who treat the manual as optional often lose time solving problems that the documentation already answered.
Reader-Friendly Summary
Motherboards, DDR5 memory, and NVMe SSDs are easiest to choose when the build is treated as a platform. The CPU socket, chipset, memory kit, storage layout, case, cooler, power supply, and expansion plan all interact. A part can be excellent in isolation and still be wrong for the system if it conflicts with the rest of the design.
Buy for the machine you are actually building. Confirm support, read the manual, check the lane-sharing rules, choose memory capacity before chasing extreme profiles, and plan storage by role. When the platform is selected carefully, the PC becomes easier to assemble, easier to troubleshoot, and easier to upgrade later.
Driver, Operating-System and Migration Planning
A platform upgrade is not finished when the hardware powers on. Chipset drivers, network drivers, storage controller behavior, audio utilities, firmware tools, and operating-system activation can all affect the first week of use. A clean installation is often the simplest path when changing major platforms, but an in-place migration can work if the user removes old vendor utilities and installs the correct support software. The important point is to plan the software side before the old system is disassembled.
Keep installers available for network access. It is frustrating to complete a build and discover that Wi-Fi or Ethernet does not work until a driver is installed from the motherboard vendor. Downloading essential drivers to a USB drive before the upgrade avoids that problem. The same preparation helps with BIOS files, storage utilities, and manuals. A few files saved in advance can turn a stressful first boot into an orderly setup.
Storage migration deserves a backup-first mindset. Cloning a drive can save time, but it should not be the only copy of important data. Before moving an operating system to a new NVMe drive or changing platform settings, copy irreplaceable files to a separate location. Verify the backup by opening a few files, not merely by assuming the copy completed. Hardware upgrades are exciting, but data is usually more valuable than the parts being installed.
When to Spend More on the Motherboard
Spending more makes sense when the extra money buys features that will be used. Stronger power delivery can matter for demanding processors, more high-speed I/O can matter for professional peripherals, and better slot layout can matter for multiple add-in cards. A debug display, BIOS flashback, or extra fan headers can also be worthwhile for builders who troubleshoot or upgrade often. These are practical features, not luxury labels.
Spending more makes less sense when the difference is mainly appearance or unused expansion. A board covered in branding does not automatically improve frame rates, editing speed, or storage reliability. If two boards support the same CPU comfortably and one has the exact connectors the build needs, the simpler option may be the smarter purchase. The saved budget can improve the SSD, memory capacity, cooler, power supply, monitor, or backup plan.